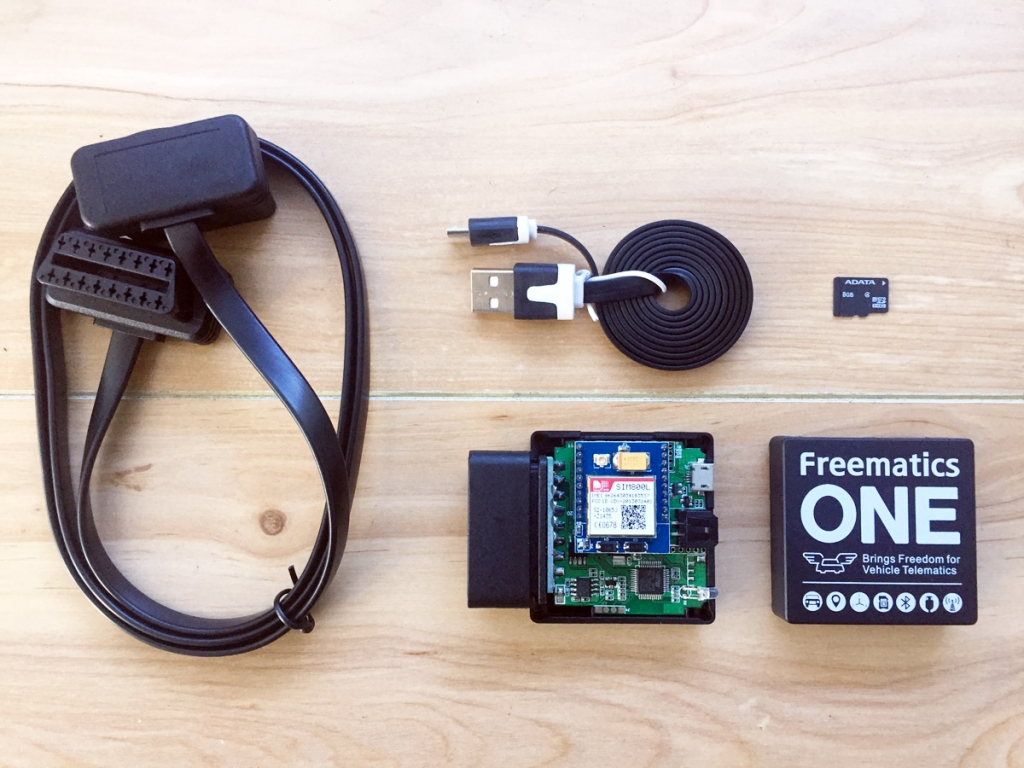
Freematics ONE ESP8266 Vehicle Telemetry Starter Kit


This is a cost-effective Arduino compatible development kit designed for vehicle telemetry projects based on Freematics ONE. As an Arduino programmable kit, it can work as, but not limited to, a vehicle telemeter device over GSM/GPRS network. The kit consists of:
- Freematics ONE (with 9-DOF motion sensor)
- SIM800L GSM/GPRS module or ESP8266 WIFI module
- OBD-II extension cable (1m length)
- 8GB microUSB card for local data logging (optional)
- External GPS receiver (optional)
- MicroUSB cable for uploading and serial monitoring
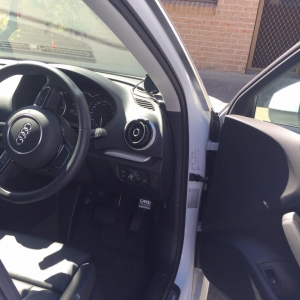
Freematics ONE plugs in the OBD port of a car, gets powered from there and work as it is programmed to do, which are normally reading out vehicle data, obtaining geo-location and motion data (like G-force or orientation) and uploading all the data to a remote server in real-time.
Geolocation
SIM800L has GSM location feature which provides proximate geo-location. The accuracy depends on number of GSM base stations in an area. If accurate geo-location is required, it is recommended to connect an external GPS receiver.
Compile and upload Arduino sketch
Freematics ONE is literally an Arduino UNO connected with some peripherals in the form of a OBD dongle. A sketch has to be uploaded to get it working. We provide fully functioning sketches for various purposes so you can get started easily. After playing well with it, you can evolve your own sketch with features you need.
Followings are the steps for compiling and uploading sketch to Freematics ONE.
1. Download and install Arduino IDE
Arduino IDE can be downloaded from Arduino website.
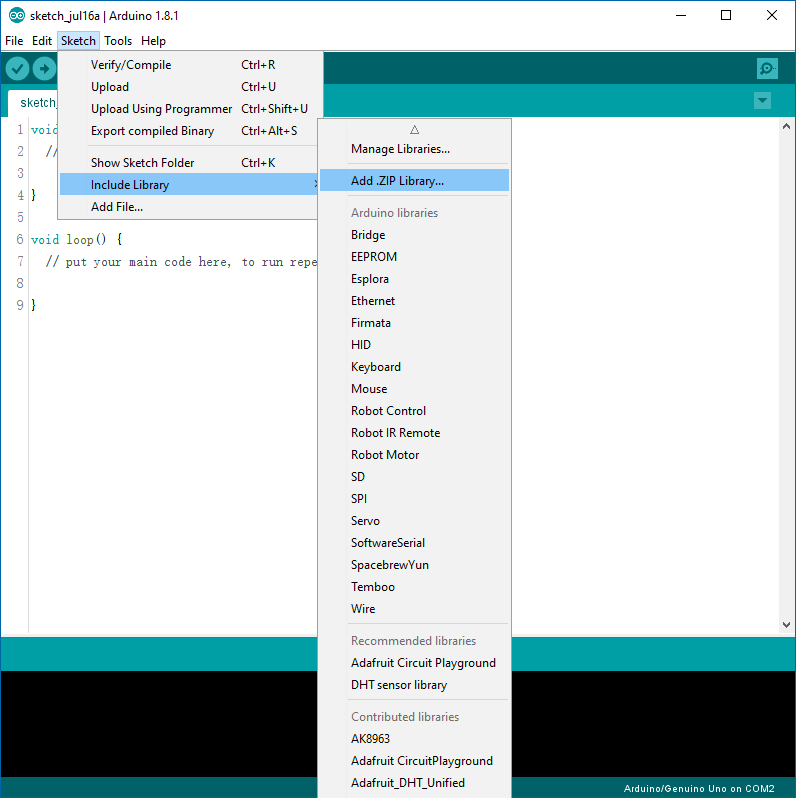
2. Import Arduino library for Freematics ONE
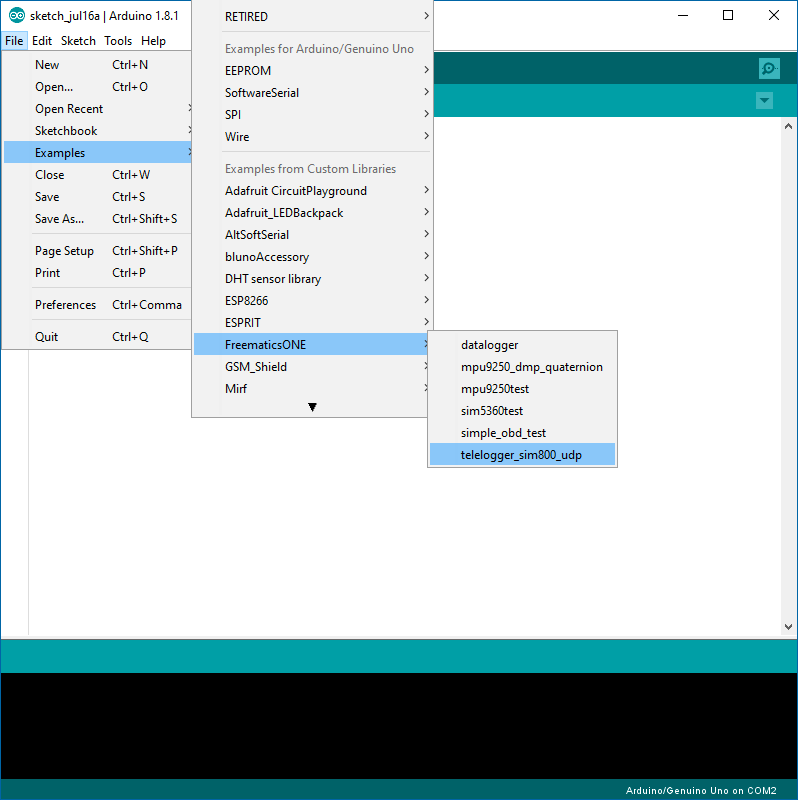
Download Freematics ONE Arduino library package. Launch Arduino IDE. Choose menu Sketch->Include Library->Add .ZIP Library and select the downloaded zip file. The library will be imported and new items will appear in the Examples menu.
3. Load the example sketch
From the Examples menu, load example sketch telelogger_sim800_udp in the case of SIM800 module, or telelogger_esp8266 in the case of ESP8266 module.
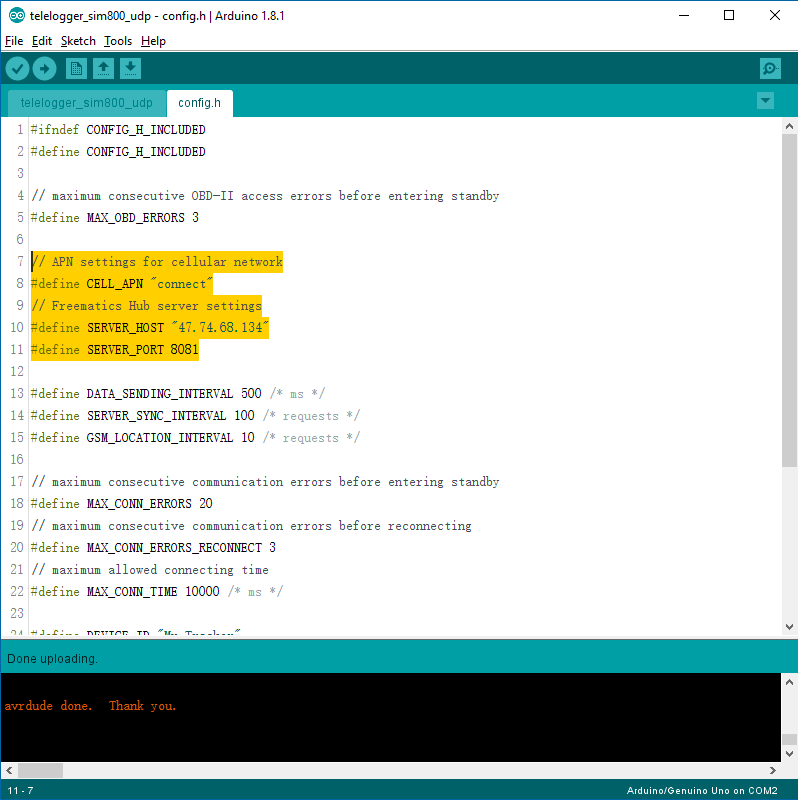
Once the sketch is loaded, click on the tab and go to config.h. In the case of SIM800 module, change the APN setting and server address to your own one. The port setting is for the UDP port used on the server for receiving data and normally should be kept default. In the case of ESP8266 module, change WIFI SSID and password to the actual ones.
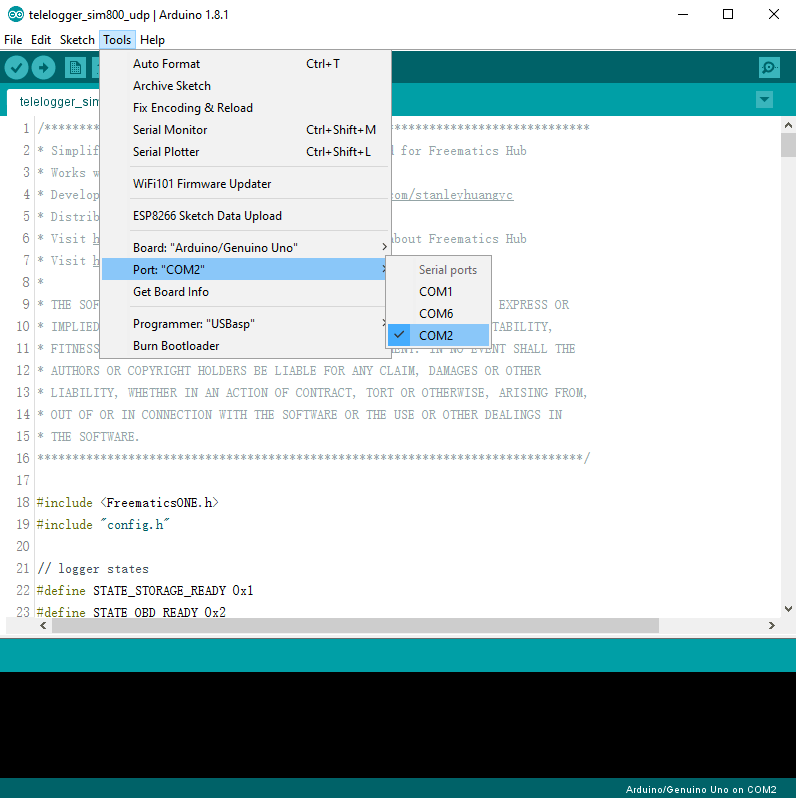
Once done, choose Arduino Uno as board and select the serial port of Freematics ONE, and click the Upload button to start compiling and uploading.
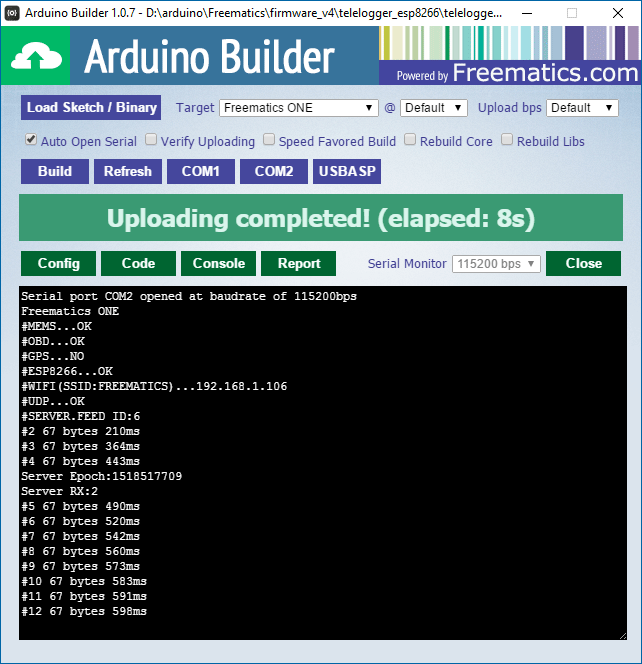
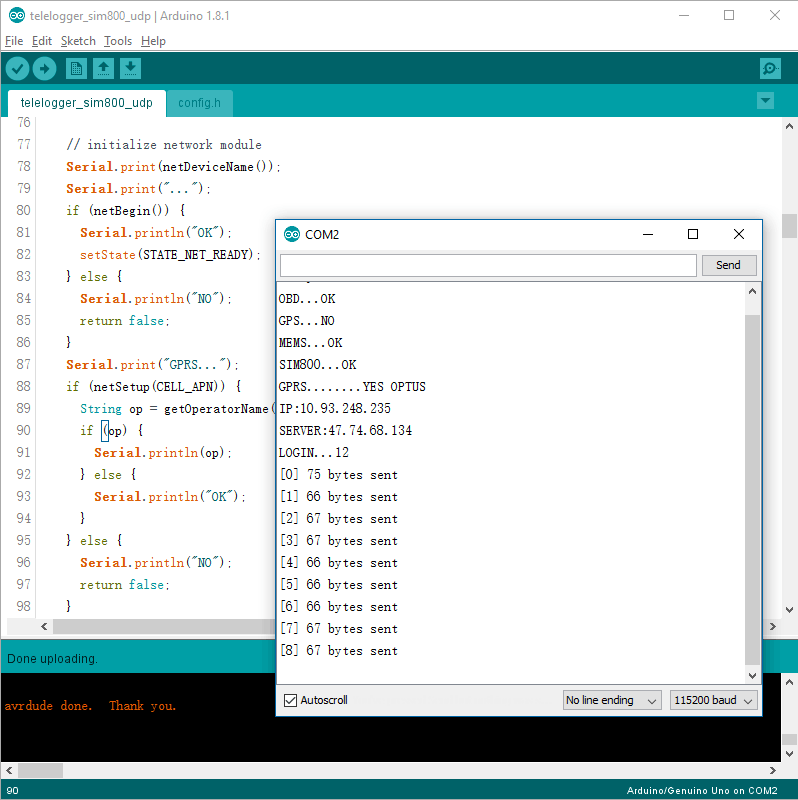
Once uploading successfully completed, we can connect Freematics ONE to car’s OBD port and see it running from serial monitor. Of course all above steps can be started with the device already plugged in OBD port. With everything good, the sketch runs like following.
Alternatively, you can use Freematics Arduino Builder to compile and upload code. When you don’t need to modify the code, this tool provides an efficient process to get the code running on the device and monitor the serial output on the spot.